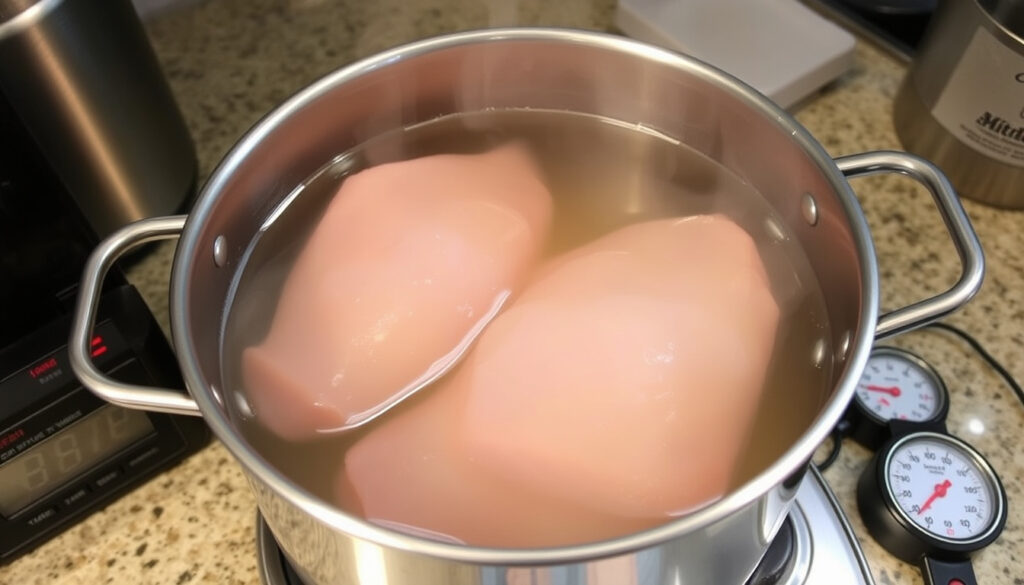
How Long to Boil Chicken Breast? Exact Times & Doneness
There’s a moment when you pull a chicken breast out of the pot and realize it’s either perfectly tender or disappointingly dry. Boiling chicken seems simple, but the difference between success and failure often comes down to a few minutes of precision — we combine food science, chef insight, and official USDA guidelines to give you exact boiling times, doneness checks, and the common mistakes that can ruin your chicken so you never have to guess again.
Boneless breast time: 10–15 min · Bone-in breast time: 15–20 min · Safe internal temp: 165°F (74°C) · Calories per 100g: 165 kcal · Protein per 100g: 31 g
Quick snapshot
- 10–15 minutes simmer (Fully Healthy cooking blog)
- Works best for shredding (Fully Healthy cooking blog)
- Season water well (Fully Healthy cooking blog)
- 15–20 minutes simmer (Fully Healthy)
- More flavorful broth
- Adjust time for thickness
- 20–30 minutes simmer (YouTube cooking tutorial)
- Add 5–10 minutes extra (YouTube cooking tutorial)
- Check internal temp carefully (YouTube cooking tutorial)
- Boil until fork-tender (12–18 min for boneless) (YouTube tutorial)
- Cool slightly before shredding
- Reserve broth for soup
Five key figures, one pattern: timing varies by cut and starting state, but safety always depends on hitting 165°F. Here’s the breakdown:
| Label | Value | Source |
|---|---|---|
| Boneless breast time | 10–15 min | Fully Healthy |
| Bone-in breast time | 15–20 min | Fully Healthy |
| Safe internal temp | 165°F (74°C) | USDA FSIS federal food-safety agency |
| Calories per 100g | 165 kcal | General nutrition data |
| Protein per 100g | 31 g | General nutrition data |
How long should you boil chicken breasts for?
If you’re after a simple number: boneless chicken breasts typically need 10–15 minutes at a gentle simmer, while bone-in cuts require 15–20 minutes (Fully Healthy). But thickness, starting temperature, and whether the breast is frozen all shift the window.
Is 20 minutes long enough to boil chicken?
- For a standard boneless breast (about 6 oz), 20 minutes is likely overcooked — leading to dry, tough meat.
- Large bone-in breasts or frozen pieces may need up to 20–30 minutes (Fully Healthy).
- Always verify with a thermometer: 165°F is the only reliable doneness signal (USDA FSIS Safe Temperature Chart).
How long to boil chicken breast for shredding?
- Boneless breasts: 12–18 minutes of simmering until fork-tender (YouTube tutorial).
- Bone-in: 18–25 minutes; the meat should pull apart easily.
- Let the chicken rest 5 minutes after boiling — this helps juices redistribute before shredding (Ellie Krieger registered dietitian).
Does boiling time vary by size or thickness?
- Yes — uneven thickness is a common cause of overcooking. Pound chicken to an even ½–¾ inch for consistent results (Ellie Krieger).
- Thin cutlets (¼ inch) may be done in about 8 minutes of simmering (Fully Healthy).
- Large (8+ oz) boneless breasts can take up to 15 minutes at a simmer.
Many recipes call for “boiling” but a rolling boil is the enemy of tender chicken. The USDA recommends a gentle simmer to keep muscle fibers from seizing up (USDA FSIS).
The pattern: precise timing depends on the cut and thickness, but the thermometer is the ultimate arbiter of doneness.
Can you overcook chicken by boiling?
Yes — boiling chicken past 165°F causes the proteins to tighten and squeeze out moisture, leaving the meat dry and stringy (Wisconsin River Meats butcher resource). The margin for error is narrow: a few extra minutes at a full boil can ruin the texture.
What happens if you boil chicken too long?
- Moisture loss: the internal temperature climbs above 165°F, water is forced out, and the meat becomes tough.
- Flavor fades: overcooked chicken loses its natural savory notes and can develop a “cottony” mouthfeel.
- The meat becomes stringy and difficult to slice cleanly.
How to avoid overcooking?
- Use a timer — set it for the minimum time (10 minutes for boneless) and check temperature early.
- Start with a gentle simmer, not a boil. Once the water reaches a boil, reduce heat immediately (Wisconsin River Meats).
- Remove from heat the moment the thickest part hits 165°F. Let the chicken rest 5 minutes — carry-over cooking will not push it significantly higher (Ellie Krieger).
The pattern: undercooking is rare (and easily fixed), while overcooking is permanent. Invest in a thermometer to save dinner.
Should you boil chicken breast covered or uncovered?
Covering the pot traps heat and steam, which speeds up cooking and helps keep the chicken moist. Uncovered simmering leads to more evaporation, which can dry out the meat and extend cooking time.
Does covering affect cooking time?
- Covered: faster, more even cooking — typically shaves 2–4 minutes off the total time.
- Uncovered: slower, and the exposed surface can become slightly firmer before the inside is done.
- Most home cooks get better results with the lid on for the majority of the simmer (Fully Healthy).
Why cover the pot when boiling chicken?
- Moisture retention: steam circulates around the chicken, reducing moisture loss.
- Energy efficiency: less heat escapes, so the burner doesn’t work as hard.
- Faster cook time: covered pot reaches and holds a steady simmer more reliably.
Covering the pot also traps more heat, so you must watch the temperature closely. If the water starts boiling vigorously under the lid, reduce heat immediately. A gentle simmer is the goal — not a rolling boil.
The implication: covering speeds cooking but demands vigilance — a watched pot truly makes better chicken.
What are common mistakes when boiling chicken?
Even experienced cooks can fall into these traps. The most frequent errors involve timing, seasoning, and technique.
Why is my chicken so tough after boiling?
- Overcooking is the #1 cause. Boiling too long or at too high a heat makes the chicken rubbery (Wisconsin River Meats).
- Uneven thickness leads to overdone edges and underdone centers. Pound the meat before cooking (Ellie Krieger).
- Skipping the rest step after cooking — cutting immediately lets juices run out (Ellie Krieger).
Do you need to season the water?
- Yes — unsalted water yields bland chicken. Add 1–2 teaspoons of salt per quart of water, along with aromatics like bay leaf, garlic, or peppercorns (Maple Jubilee recipe blog).
- Some cooks use chicken broth instead of water for richer flavor.
Should you start with cold or boiling water?
- Start with cold water, then bring to a gentle boil before adding the chicken. Dropping chicken into already-boiling water can cause uneven cooking and toughen the outer layer quickly.
- One tested method: place chicken in a pot, cover with cold water by 1 inch, then bring to a simmer (Fully Healthy).
- For frozen breasts, add 5–10 minutes to the time and start from cold water to allow the inside to thaw gently.
What this means: most boiled chicken problems trace back to either rushing (high heat) or skipping seasoning. A little patience and a thermometer fix both.
How to know if boiled chicken breast is done?
The only foolproof way to verify doneness is an instant-read thermometer. Visual cues can help, but they’re not reliable for safety.
How to tell if boiled chicken is done without a thermometer?
- Cut into the thickest part: the meat should be opaque white throughout with no pink translucency.
- The juices should run clear (not pink or red).
- Pierce with a fork: if the meat shreds easily and the fibers separate, it’s done (YouTube tutorial).
What internal temperature is safe for boiled chicken?
- 165°F (74°C) — as per the USDA. This is the minimum safe internal temperature for all poultry (USDA FSIS Safe Temperature Chart).
- Insert the thermometer probe into the thickest part of the breast, avoiding the bone if bone-in.
- If you don’t have a thermometer, the visual checks above are a backup, but the USDA strongly recommends a thermometer for food safety (USDA FSIS).
The trade-off: visual cues are convenient but can be misleading — especially with bone-in or thick cuts. A $10 digital thermometer eliminates the guesswork.
How to boil chicken breast: step-by-step
- Prep the chicken. If breasts are uneven, pound them to ½-inch thickness for even cooking (Ellie Krieger).
- Arrange in a single layer. Place chicken in a pot large enough for a single layer (Fully Healthy).
- Add liquid. Cover with cold water or broth by about 1 inch (Wisconsin River Meats). Season generously with salt and aromatics (Maple Jubilee).
- Bring to a boil, then reduce to a simmer. Cover the pot, heat on high until water boils, then lower heat to maintain a gentle simmer.
- Cook for the recommended time. Boneless: 10–15 minutes; bone-in: 15–20 minutes; frozen: 20–30 minutes. Use the lower end initially.
- Check temperature. Insert an instant-read thermometer into the thickest part. It must read 165°F (USDA FSIS).
- Rest and serve. Remove from liquid, let rest 5 minutes on a cutting board, then slice or shred. Reserve the broth for soup or sauces.
A common mistake is boiling at a full boil rather than a simmer. The rapid bubbling agitates the meat and squeezes out moisture, turning tender chicken into a rubbery mess. Keep the water at a gentle bubble — you should see small bubbles rising, not a violent roll.
The takeaway: following these steps in order removes the guesswork from boiling chicken. For more cooking technique guides, read about What Is a Smash Burger?. And if you’re in the mood for baking, try our Hot Cross Buns Recipe.
Confirmed facts
- Boiling water reaches 212°F (100°C).
- Chicken is safe at 165°F internal temperature (USDA FSIS).
What’s unclear
- Exact boiling time varies with starting temperature, size, and whether bone-in or boneless.
- The precise moment when chicken becomes ‘tough’ depends on temperature and duration.
- Overcooking makes chicken dry and tough — the exact threshold varies by cooking method and meat thickness.
Poultry, including chicken breast, is safe to eat at an internal temperature of 165°F.
— USDA Food Safety and Inspection Service (U.S. federal agency)
Pounding chicken breast to an even thickness is a simple trick that prevents overcooking the thin end while you wait for the thick part to cook.
Boiled chicken doesn’t have to be bland or tough. The science is straightforward: keep the liquid at a gentle simmer, hit 165°F, and rest the meat. For home cooks who want juicy chicken for salads, sandwiches, or shredding, the choice is clear: invest in a good thermometer and follow a timing chart, or risk ending up with dry, flavorless meat that ruins the dish.
Getting the timing right is crucial, and you can find a detailed breakdown of how long to boil chicken breast for tender, juicy results every time.
Frequently asked questions
Can I boil chicken breast from frozen?
Yes. Add 5–10 minutes to the cooking time. For a standard frozen boneless breast, expect 20–30 minutes at a gentle simmer. Always check internal temperature in the thickest part (YouTube tutorial).
Do I need to add oil to the water when boiling chicken?
No. Oil floats on top and does not penetrate the meat. It may help prevent foaming, but seasoning the water with salt and aromatics is far more important for flavor.
Is boiled chicken healthy?
Yes. A 100g serving of boiled chicken breast provides about 165 calories and 31g of protein with minimal fat (Fully Healthy). It’s an excellent lean protein source.
What spices can I add to the boiling water?
Bay leaves, whole black peppercorns, garlic cloves, onion halves, thyme, and lemon zest all infuse the meat with flavor. Salt is essential (Maple Jubilee).
Can I reuse the chicken broth after boiling?
Absolutely. Strain the broth and store it in the fridge for up to 4 days or freeze for 3 months. Use it as a base for soups, rice, or sauces.
Should I trim fat before boiling chicken breast?
Trimming excess fat is optional. Fat adds flavor to the broth, but if you want a leaner result or clearer broth, trim visible fat before cooking.
More related posts
 Vancouver Whitecaps FC Games 2026: TV, Times & Stream
 Another Word for Experience: 70+ Synonyms for Resumes & Essays
 Games to Play with Friends Online: 20+ Free Multiplayer Picks
 Paying Off Your Mortgage Game Changer: Pros, Cons & Steps
 Departure Bay to Horseshoe Bay: Ferry Schedule, Duration & Guide
 Milt Stegall: Son’s Death, Wife, Net Worth & CFL Career
 India vs Sri Lanka Match Scorecard – Asia Cup Super Fours 2025